Monday, October 26, 2015

Special Event: Camp in a Year (Residential)

Nova Scotia Brownies 100th Anniversary Challenge
You in Guiding: Learn About Guiding (YiG2)
You in Guiding: Be Involved in Your Community (YiG4)
You and Others: Learn about Leadership in a Group (YaO1)
Discovering You: Discover What's Important to You (DY1)
Discovering You: Discover Your Creativity (DY2)
Discovering You: Stay Fit and Healthy (DY3)
 
Beyond You: Try New Things (BY3)
Campfire Leading badge (CL)


For our camp we completed the NS Brownie 100th Anniversary Challenge (full disclosure--I helped create the challenge!) and we had our theme as Camp in a Year. The two dovetailed nicely together and we had a wonderful time!

FRIDAY
7:00-7:30 Arrival

7:30-8:00 Orientation and Ice Breaker: The girls played the Human Knot as we waited for our last girl to arrive. Then we went over the rules and the plan for the weekend.

8:00-9:00 Glow Stick Ring Toss (4 groups)—
This was really fun. We had two different versions of the game--2 groups had a hoop made out of bracelets and 3 necklace pendants to throw into the hoops. The other 2 groups have 4 water bottles with necklace pendants in them and used bracelets to try to throw onto the water bottles. (STEM #2)
Supplies: 5 bracelets/hoop, 3 necklace pendants/hoop, 8 water bottles, 8 necklace pendants, 6 bracelets 

While we were outside, we also lit sparklers, then had our countdown to 1915 New Year's, and sang Auld Lang Syne.

9:00-9:30 Mug Up—Apple juice and Sprite in plastic champagne glasses. Appetizers of crackers, cheese and turkey kielbasa. They had a choice of either straight apple juice or apple juice mixed with pop.

9:30-10:00 Campfire—We had a campfire sing-a-long. (CL#1) We sang:
Fire's Burning
Buddies and Pals
Ging Gang Gooli
Sharks
Barges
On My Honour
Taps

10:00-11:00 Get ready for bed

11:00 Lights out

SATURDAY
7:00-8:00 Wake up and make valentines. Each girl made 2 valentines to give to the girl sitting on either side of her at breakfast.
Supplies: card making supplies or premade valentines 

8:00-9:00 Valentine’s Breakfast--Pink pancakes and fruit

After breakfast, the girls did their duties before we started our stations.

9:00-11:30 Four stations, 30 minutes each


STATION 1: Birthday boxes (SERVICE #1) (YiG4#3) Each group will make create 1 box with the supplies needed to have a small birthday party. 
Supplies: Cake mix, frosting, candles, cups, paper plates, decorations, party favours, napkins, small toy for birthday child (we got Beanie Boos, since our girls love stuffed animals so much), wrapping paper to decorate boxes, cookie boxes


STATION 2: Brownie History (HERITAGE)—One of our leaders still has her Brownie badges on a piece of yellow felt so she brought that and the girls had to guess what they thought the badges were for and then they searched through the Brownie Badge Archive from the Ontario Girl Guides that had been printed off to find out what they really were (YiG2#6)


STATION 3: Fractals (STEM #3)
In 1915, Waclaw Sierpinski describes the Sierpinski triangle for the first time, though the pattern had been used in decorations for years before.  Fractals are self-similar patterns that can be found in many places, but nature is a great place to start looking.  The Sierpinski triangle is the simplest fractal to recreate.
  • Dots are the midpoints of the edges, half way between the corners.  Connect the dots as shown below to form a new triangle, pointing down.  Colour it in.
  • You are now left with three white triangles.  Find the midpoints of each of these three triangles, connect them, and color in the resulting triangles (pointing down).
  • Each of the 3 triangles now turns into 3 smaller triangles, leaving 9 small white triangles.  Connect the midpoints of each of the 9 white triangles to form 27 smaller triangles, pointing downward.  Colour them in.
  • Continue this process if you wish, as long as you have patience.
  • When you are done, cut the big triangle out and write your name on the back.
  • Next join your fractal triangle with 2 other fractal triangles to form a bigger triangle.
  • Then add 2 more groups of 3 triangles to form a bigger triangles made of 9 triangles


Supplies: Pre-printed triangles, markers/colour pencils (BY3#4)


STATION 4: Campfire songs (ARTS #1) For each of the four groups, I prepared a different set of songs from 1915 or earlier. With each group, we sang/learned all 7 or 8 songs in the set, and then each girl chose a song to lead at campfire that night. Then we practiced what they need to do to lead a song (say the name of the song, divide the group if it's going to be in rounds, explain if there are repetitive parts in the song). (YaO1#5, CL#2, CL#3, CL#6) (Songs with lyrics, Word doc)

9:00-9:30 STATION 1

9:30-10:00 STATION 2

10:00-10:30 Easter Snack—Snacks were put into Easter baggies (one of our Guiders has everything you'd ever want) and hidden outside for them to find.

10:30-11:00 STATION 3

11:00-11:30 STATION 4


11:30-1:30 LUNCH Cinco de Mayo—Tacos in a bag. We've started taking the camp stoves to residential camp as well as tent camping, to give the girls more exposure to using them. 

Cook hamburger on camp stoves, chop tomatoes and lettuce, grate cheese. Everything goes into a Ziploc bag with tortilla chips, salsa, sour cream

After lunch, we had a pinata for them. We had mostly non-candy--stickers, pencils, notepads, plastic rings--plus Welch's gummy snacks, chocolate bars, and rockets. They were told to take one of each non-candy thing and then they were allowed to have 2 food products. 

We lined them up from youngest to oldest, to take away the fighting over who got to go first. For the first time through, they were blindfolded and got to take one swing. The next time through, they weren't blindfolded but again, just one swing at the pinata. I think they all got 3 chances to hit it before it broke enough to spill its content. 


1:30-2:30 Quiet time/Free time--Now is the time that they can hang out in the bunk room. We also set out craft supplies for them to do with as they please and to make presents for their secret buddies.

2:30-3:15 Afternoon snack—Eid al-Fitr. We have a Muslim girl in our unit and wanted to include a holiday that's important to her as well. I emailed her mom for suggestions and they offered to bring the date squares for our snack. The date squares were DELICIOUS and every girl tried them and most of them loved them.
Date squares, carrots, cucumbers

3:15-4:15 Outside games  (ACTIVE LIVING #2) 
Playing Mousetrap
We organized some outdoor running games and had a beautiful afternoon for it. We started with some tag games, then played Mousetrap and Pip, Squeak, Charlie. Then we got some ropes and balls out and let them play some games on their own. 

If it had rained, we would have done some inside, since we had a fairly big space in our building. If we hadn't had a space, we would have played board games instead.
(DY3#4)
Supplies: jump ropes, hula hoops, balls

4:15-5:00 
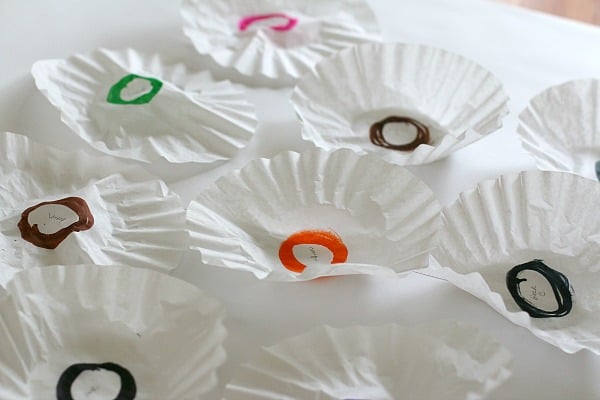
LBP Time line: I took the story of LBP that is in the BC Lady Baden-Powell challenge booklet and created 12 milestones in LBP's life, while also adding in when she visited Nova Scotia. I made 4 sets for the relay race. First, I read the story out loud to them, and then they had a relay race where they had to gather the 12 colour-coded pieces, and then put them into order. (LBP Relay race, Word doc) (YiG2#1)

5:00-6:30 Supper—Halloween-inspired food. We had Mummy dogs (crescent roll hot dogs), spider dogs (each end of the hot dog was sliced into four and then boiled, which makes the "arms" curl up), plus a pasta salad.

6:30-7:30 Quiet time/free time--More time on their own

7:30-9:00 Campfire
The girls all did a great job leading their songs at campfire that night. (CL#7, CL#8)

9:00-9:30 Mug Up – Christmas Eve. We roasted marshmallows over the fire and then everyone got Smore mix as well (Teddy grahams, mini marshmallows, and chocolate chips). Plus hot chocolate, which was much needed on the cool October night!

9:30-10:30 Get Ready for bed

10:30 Lights Out

SUNDAY

7:00 Wake up

8:00-9:00 Bags must be packed and outside before campers are allowed to have breakfast. Once finished breakfast, they can help clean the building.
Breakfast: Muffins, fruit, boiled eggs

9:00-10:00 Clean up

10:00 Guide’s Own Oh, they were so intrigued by the stockings! We filled them as though we were in 1915, with oranges, chocolate, a small toy (rubber duckie), and their earned badges. We started by singing Buddies and Pals, revealing our Secret Buddies, singing Say Why, sharing our Apples and Onion (2 things we liked about camp, 1 thing we didn't), singing Softly Falls, opening our stockings, and finally singing Daytime Taps.


International Day of the Girl 2015

International Day of the Girl (IDoG)


Discovering You: Discover What's Important to You (DY1)
Discovering You: Discover Your Creativity (DY2)
Discovering You: Stay Fit and Healthy (DY3)
You and Others: Learn How to Plan (YaO3)

I didn't plan this meeting, so I don't have all of the templates for it. 

We don't have our Patrols yet, so we didn't have Patrol time. 

Show and Tell (IDoG#5)
The week before, we told the girls to bring a favourite toy to this meeting. We went around the circle and each girl got to share what she brought and  why she liked it. 90% of the toys were stuffed animals, but we also had some other things. (DY1#6)

Designing a toy for boys and girls to play with
Then we had a great discussion about toys that girls play with, toys that boys play with, and if there is any difference. We decided that boys like stuffed animals too and there's nothing that girls or boys play with that can't be played with by anyone. We talked about my pet peeve: that McDonald's classifies Happy Meal toys as "girl toys" and "boy toys" and that girls can like Hot Wheels and boys can like Littlest Pet Shop and they shouldn't have to declare their gender in order to get a toy! 

Next we gave them large pieces of papers to draw a design for a toy that boys and girls would both like to play with. They did some great brainstorming and working together in their groups. (DY2#2)

Guider Lori's roadtrip to cake decorating success
Building a Roadmap to Success (IDoG#2)
Guider Lori created a large Roadmap to Success to show the steps she took to become a person who decorates cakes (and she makes beautiful cakes--Femmes Fondants). 

Then we gave the girls smaller versions and they needed to set a goal and decide the steps they will need to take to complete the goal. They have lots of great goals, including becoming artists and basketball players, to name a few. 

Then we gathered together again and everyone shared what their goal was and one of the steps along way. (YaO3#3)

My Name Is Me (IDoG#6)
Our final activity was to create Wordles from our names. You take your name and then choose adjectives for each letter of our name that describe us. The girls really enjoyed this activity. We had printed off lists of adjectives for every letter to help us think up some adjectives. (DY1#6, DY3#5)

And finally, for International Day of the Girl, we colour swapped our uniforms with the colours of St Vincent and Grenadines, our twinning partner. Everyone wore green, blue, and yellow celebrate the colour swap.


Meeting #25: Evil Dr Greyzone and the Great Colour Hunt

Beyond You: Try New Things (BY3)

Chemistry badge (C)

I found this Wide Game on Guider Laurie's blog, guideydiary, from Australia. It works great as is, but I noticed if I modified a couple of things, we could cover our Chemistry badge, so of course, we did!

We invited some second year Brownies to come to visit us for this meeting--a great introduction into the Guide  program!

Example of where the circle should go
Patrol Time: We gave them this instruction:
Each girl needs to create colours on a coffee filter.
  1. Take one coffee filter each.
  2. Using either a black or brown marker, draw a circle around the middle (see example for where the circle should go).   
  3. Fold the filter in half, and then in half again.
  4. Place your filter into a plastic cup that has water on the bottom. Make sure where you drew the circle is not touching the water.
  5. Write your name on the cup so you’ll remember which was yours!

How it works: Marker colours are made of many different colours. When the liquid creeps up the coffee filter, it dissolves the coloring molecules and splits it into different colored chemicals. Different colors get carried along faster and farther than others because some color molecules are bigger and heavier than others. This is called chromatography. (C#4)

Once the girls started their activities, we took the filters out of the water and laid them out on paper towel so they could dry.

Then in their patrols they work on a puzzle using the Periodic Table:
Guider Laurie's note: I just found a periodic table on Wikipedia – you can probably get a clearer version than this. The numbers in the table correspond with an element, which the Guides then write down the symbol for. The trick is that only capital letters are required, not the lower case ones. Our Guides struggled a bit with this, until we told them the trick.

Horseshoe: We did Horseshoe with the Brownies, to show them how it worked. Then I asked if they had figured out the puzzle answer. To see if they were right, I had written it in lemon juice on a white piece of paper. To reveal the answer, I used an iron to heat up the paper and reveal the answer. (C#3)

Next, we gave each group a list of the order they were to complete the stations. We had envelopes at the front of the room that they could open that corresponded to the colour they were working on. (Colour clues, Word doc) Most of these clues are copied directly from GuideyDiary.

YELLOW ACTIVITY
Locate the yellow edible items, and put them away for safekeeping for now. Rumour has it that Doctor Greyzone hides food items in the kitchen.
You may take up to two per person.
DO NOT eat them yet!
Yellow science:
Marshmallows are originally made by mixing together various ingredients and baking them. All types of cooking, but especially baking, involve chemistry to get the right mix of flavours and textures. So each time you cook, you’re also doing science!

NOTE: We didn't use yellow marshmallows--just plain white ones! I didn't remember until the morning of the meeting that one of girls can't eat marshmallows, but I emailed  her mother who sent along some vegan ones, so all was good. We hid the marshmallows in the our kitchen area.

ORANGE ACTIVITY (C#8)
To find orange, each patrol member will need to (safely and sensibly!) light a candle and toast your marshmallow.
Orange science:
The tips of matches are made up of sulphur and potassium chlorate. When the matches are struck firmly against the ignition strip on the matchbox, which includes red phosphorus, the ingredients combine to make a brief flame. The wood and wax in the matches then keep the flame going long enough for you to use the match.

NOTE: The Brownies were so excited to be able to light a match! Lots of girls are scared at first, but I explain in depth the process, especially  that when the match first lights, it'll go WHOOSH but then it'll settle down, and to make sure you hold the match pointing up or else the flame will get your fingers. I also tell them to make sure to move the match away from the candle flame before blowing it out, or you'll blow out the match and the candle. Then I ask the older girls who has done this, and everyone raises their hands! This way, the girl won't feel as bad about doing it, knowing everyone does it! One girl started off being terrified of lighting a match to asking to keep lighting more!
Coffee filter butterflies, using
brown, blue, and red markers

RED ACTIVITY
To find red, you need to make a butterfly. Take your coffee filter, scrunch it up in the middle, and secure it with a clothespin. Tie the red pipe cleaner around the clothespin to make antennae, and draw a face on the clothespin. Or you can secure the coffee filter with the red pipe cleaner.
Red science:
The study of living things is known as “biology”, while the more specific study of insects, like butterflies, is known as “entomology”. Biologists try to understand creatures and plants of all types.

PURPLE ACTIVITY
To rescue purple, your patrol will need to blow up one purple balloon, and then using the purple straws provided, blow the balloon from one end of the hall to the other. Be sure to keep the balloon safe!
Purple Science: 
When you blow into a balloon, the air (oxygen and carbon dioxide) you send out is ‘trapped’ in the balloon, and so it stretches out the rubber and expands.

BLUE ACTIVITY (C#2, C#7)
The youngest member of your patrol has twisted her ankle. Administer appropriate first aid, remembering RICE: Rest, Ice, Compression, Elevation.
To recover blue you will need to make an icepack and treat your injured team member properly.
Ingredients
·         Citric Acid
·         Baking Soda
·         Tap Water
·         Blue food colouring
·         Zip lock bag
·         Measuring cup
·         Plastic teaspoons

What to do:
1.       Put one level teaspoon of citric acid in a zip lock bag.
2.       Put one teaspoon of baking soda in the same zip lock bag. And shake the bag gently to mix the two chemicals.
3.       Fill up the measuring cup with cold tap water (about 30ml). Add a couple of drop of blue food colouring.
4.       Here’s where you have to be quick! Pour the water into the zip lock bag and snap it shut fast. Not only does the bag blow up, it also becomes super cold! So don’t forget to feel its temperature.
Treat your patrol member properly before proceeding.
Blue science:
Citric acid and baking soda (with the water) form an “endothermic chemical reaction”, which is a type of reaction where heat is absorbed, resulting in something very cold – at least for a while.

GREEN ACTIVITY (C#1, C#7)
To save green, you will need to make green slime.
Ingredients
·         PVA glue
·         food colouring
·         water
·         Borax
·         2 plastic cups
·         a sealable plastic bag
·         some paper towels
·         Paddle Pop stick for stirring
·         at least two plastic spoons

What to do
1.       Write your name on a Ziploc bag.
2.       Measure 3 teaspoons of PVA glue into the cup (Up to the bottom line of the cup)
3.       Add 3 teaspoons of water and stir with popsicle stick.
4.       Add a few drops of dye to make green.
5.       Place approximately 1 cup of water into a large plastic cup.
6.       Stir in 1 heaped teaspoon of Borax powder. Once the mixture has been stirred thoroughly you have made a Borax solution.
7.       Add 1 teaspoon of Borax solution to your cup of paste and stir. As you stir the slime should start to form. You might need to add a little more Borax solution. Be careful when you are adding the Borax solution, too much and your slime will go hard.
8.       If your slime feels very wet and slippery (but is not still runny), remove it from the container and knead it in your hands. In a few minutes, any extra Borax solution will evaporate or be absorbed.
9.       Place the slime into a sealable plastic bag and it should keep for a while.
Make sure you wash your hands after playing with the slime.

Green science:
You are blending together different types of materials to form a non-Newtonian fluid. The borax and glue (in particular) bond together at lots of different points (at a chemical level), to create a flexible, different type of material.

To finish the meeting, we told the girls that they had restored the colours and we blew some bubbles for them to pop. 

Everyone had a great time, and almost all of the Brownies who came to visit then chose our unit to register in for next year!